If you’ve ever stood in front of a mirror, staring at chipped polish and wondered whether you could recreate that salon-fresh look in your own living room, you’re in the right place. This guide is written like a friendly conversation between you and a seasoned at-home manicure pro — no judgment, just practical tips, easy-to-follow steps, and a few insider tricks that will make your manicure last longer and look better. Whether you’re a complete beginner or someone who colors their nails every weekend, this article will walk you through everything from gathering supplies to finishing touches, and a little extra on nail health so your hands look good and feel great.
Think of this as your manicure road map. We’ll start with the basics — what you need in your kit — and then move through the whole process step by step. Along the way we’ll discuss common mistakes, quick-dry options, nail art ideas you can do at home, and maintenance tips that keep your nails looking freshly done longer. There are tables that make choosing tools simple, and lists to keep you organized. Grab a cup of tea, set aside an hour or two, and let’s make your nails a small but satisfying self-care ritual.
Why Doing Your Manicure at Home Is Worth It
You might be tempted to dismiss the idea: salons have the tools, the atmosphere, the trained technicians. But at-home manicures have big advantages. First, convenience: you can paint your nails while watching your favorite show, and touch up chips in the middle of the week. Money is another clear benefit — salon visits add up, whereas a solid kit pays for itself after a few uses. And there’s the creative freedom — try trendier colors, experiment with different finishes, or take your time practicing nail art without feeling rushed.
At-home manicures also give you control over hygiene. You decide how tools are sanitized and which products touch your skin. For people with sensitive nails or those recovering from nail damage, that control matters. Finally, performing your own manicure can be therapeutic. The slow, deliberate motions — filing, massaging, painting — offer a calming ritual that benefits both hands and mind.
What Makes a Great At-Home Manicure
A great manicure isn’t just about perfect color application. It’s about preparation, the right products, and finishing techniques that protect and enhance your nails. Preparation includes removing old polish, cleaning and shaping the nails, and tending to cuticles without over-trimming. The right products include a base coat, a color that applies evenly, and a top coat that seals and protects. Finishing touches include cuticle oil and hand cream to keep skin healthy and nails glossy.
A great manicure also balances aesthetics and nail health: choose breathable polishes when possible, avoid overly aggressive filing and cutting, and give your nails occasional breaks from polish. The steps in this guide will help you build a repeatable routine that produces salon-quality results at home.
Essential Tools and Products: Your At-Home Manicure Kit
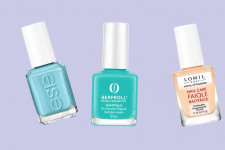
Before you begin, assemble a compact kit. Investing in a few good tools pays off because you’ll use them repeatedly. Below is a table to help you compare essential items and why they matter.
| Item | Why You Need It | Notes |
|---|---|---|
| Nail polish remover (acetone & non-acetone) | Removes old polish and cleans surface | Acetone removes stubborn polish faster; non-acetone is gentler |
| Cuticle oil | Hydrates and softens cuticles | Use right after finishing manicure for best shine |
| Base coat | Protects nail, evens surface, prevents staining | Look for ridge-filling or strengthening formulas |
| Top coat | Seals color, adds shine, prevents chipping | Fast-drying top coats save time |
| Nail clippers and quality nail file | Shape and trim nails precisely | Glass files are gentle; emery boards are cheap and common |
| Cuticle pusher and nippers | Tidies the nail bed and removes hangnails | Be gentle; over-trimming causes damage |
| Buffer block | Smooths ridges and polishes surface | Use sparingly to avoid thinning nails |
| Lint-free wipes or cotton balls | Remove polish and clean nail plate | Lint-free prevents fibers sticking to polish |
If you want to add extras, consider a quick-dry spray, a small LED lamp for gel polishes, nail strengtheners, and a nail brush for cleaning under the free edge. You don’t need everything at once; assemble as you go.
Quick Supply Checklist
- Nail polish remover (both acetone and non-acetone if you prefer)
- Base coat and top coat
- Two or three nail colors you love
- Nail clippers and nail file (glass file preferred)
- Cuticle pusher, cuticle oil, and nippers (optional)
- Buffer block
- Lint-free wipes or cotton pads
- Small bowl for warm water and gentle soap
- Hand moisturizer or lotion
Preparing Your Nails: Why Prepping Matters
Preparation is the foundation of a long-lasting manicure. Skipping steps makes polish peel sooner, or it can leave your nails looking uneven. Think of prep as laying a smooth, clean canvas that allows color to adhere and shine. The prep stages include removing old polish, soaking and cleaning, trimming and shaping, and gentle buffing.
Step 1: Remove Old Polish Thoroughly
Start by removing old polish completely. Soak a lint-free pad with remover and hold it on each nail for a few seconds, then wipe down. If you’re removing glitter polish, use foil wraps with acetone: soak a cotton pad, place on nail, wrap in foil for 5–10 minutes, then push polish off gently. Removing old layers prevents unevenness and helps the base coat bond to the nail plate.
Step 2: Soak and Clean
A warm soak softens cuticles and loosens dirt. Fill a small bowl with warm water and a drop of mild soap. Soak your nails for about 5 minutes. Use a nail brush to gently clean under the free edge. This removes oils and grime that might prevent polish from sticking. After soaking, dry your hands thoroughly; polish adheres better to a dry surface.
Step 3: Trim and Shape
Decide on the nail length and shape you want. Popular shapes include square, rounded, squoval (square + oval), almond, and oval. Below is a table that helps match shapes to nail widths and lifestyles.
| Nail Shape | Best For | Notes |
|---|---|---|
| Square | Wide nails, practical lifestyles | Strong edge, less likely to snag |
| Rounded | Shorter nails, classic look | Softens the look of nails and is low maintenance |
| Squoval | Most people | A balanced, modern shape that suits many hands |
| Almond | Longer nails; elegant look | Elongates fingers but requires maintenance |
| Oval | Most hand types | Sleek and feminine, also forgiving for shorter lengths |
Use clippers for length and a file to refine shape. File in one direction to avoid splitting; sawing back and forth weakens the nail edge.
Step 4: Cuticle Care
Cuticles are living tissue; they protect the nail and should be handled gently. After your soak, apply cuticle remover or oil. Gently push back cuticles with a wooden stick or a metal pusher at a small angle — never force them. If you have hangnails, trim them carefully with small nippers, not by tearing. Over-trimming the cuticle can lead to infection or dry, ragged skin, so less is more.
Step 5: Buffing and Cleaning
Light buffing smooths ridges and creates a uniform surface for polish. Use a fine-grit buffer, and only buff lightly — aggressive buffing thins the nail. After buffing, remove any dust with a lint-free wipe dampened with polish remover to ensure the nail plate is oil-free. Oils on the nail can cause polish to peel, so this final clean is important for longevity.
Applying Polish: A Step-by-Step Walkthrough
Now for the fun part: applying color. The technique is straightforward, but small habits make a big difference: thin layers, steady hands, and patience between coats will give you a salon-level finish.
Step 6: Apply Base Coat
A base coat does a few things: it protects nails from staining, provides adhesion for color, and can smooth surface ridges. Apply a thin, even layer to each nail. A good trick is to run the brush along the free edge (cap the tip) to help prevent chipping. Allow the base coat to dry fully — usually 1–2 minutes for most formulas. If you rush, the colored polish may streak or not adhere properly.
Step 7: First Color Coat
Shake the polish gently to mix pigment (don’t shake too hard — bubbles). Remove excess from the brush by wiping once on the bottle rim. Start with a stroke down the center of the nail, followed by strokes on each side. Aim for thin coats: one thin coat is better than a thick one that takes forever to dry and chips easily. Keep polish away from cuticles and skin — paint on skin will lift and cause peel.
Step 8: Second Color Coat
After the first coat dries enough to be tack-free (2–3 minutes typically), apply a second thin coat using the same technique. Most colors need two coats for opacity, but some pigmented polishes may require a third. If you need a third coat, be cautious: more thin coats are better than fewer thick ones.
Step 9: Clean Up Edges
No one’s polish is perfect. Use a small brush dipped in remover to clean up mistakes around the cuticle or sidewalls. This quick touch-up makes polish look professionally applied. If you make a big mess, let the polish dry slightly and peel away the excess from the skin — it comes off more cleanly.
Step 10: Apply Top Coat
Seal the color with a top coat. Apply one thin layer across the nail and cap the free edge to lock the tips. A high-quality top coat adds shine and protects against chips. If you use a quick-dry top coat, it helps speed up the process, but remember that quick-dry products sometimes reduce glossy depth compared to slow-dry ones. For best results, choose top coats that promise long wear and high gloss.
Step 11: Drying Tips
Let nails dry fully. Air drying takes longer, but is effective if you’re patient. Here are some practical drying aids:
- Quick-dry top coat or spray
- Cool air from a fan or a blow dryer set to cool
- Dip nails in a bowl of cool water after each coat to set the polish
- Use a UV/LED lamp for gel polishes (follow manufacturer’s instructions)
Avoid hot water for an hour after painting, as heat can soften polish and cause dents. If you’re in a rush, try a quick-dry medium and keep movements minimal for at least 15–20 minutes.
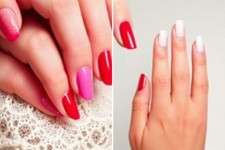
Nail Art for Beginners: Simple Ideas to Try
Once you’re comfortable with basic polish application, try some easy nail art to add personality. You don’t need fancy tools; household items can help.
Simple Designs to Start With
- Accent nail: Paint one nail a different color or with glitter for a focal point.
- French tip: Use tape or a sticker to create a clean white tip; practice makes perfect.
- Polka dots: Use a toothpick or dotting tool to place dots over a base color.
- Striping: Thin lines made with a striping brush or tape add geometric interest.
- Ombre: Blend two shades with a small sponge for a gradient effect.
A small dotting tool (or the tip of a bobby pin) and some striping tape can take you surprisingly far. Practice on a piece of paper or a spare nail tip first.
Tools for Nail Art
If you decide to expand your kit, consider:
- Dotting tools in multiple sizes
- Thin striping brushes
- Fine-tipped acrylic paint markers for precision
- Latex liquid peel for easy cleanup around the nail
But remember: creativity often beats tools. A steady hand and patience are the real skills.
Common Manicure Mistakes and How to Avoid Them
Even experienced DIY-ers make mistakes. Here are common pitfalls and simple fixes.
Mistake: Applying Thick Coats
Thick coats look uneven and take much longer to dry, leading to dents and smudges. Fix: use thin layers and build opacity over two or three coats.
Mistake: Skipping Base Coat
This can lead to stubborn stains on your nails, especially with dark or pigmented colors. Fix: always start with a base coat — your nails will thank you.
Mistake: Pushing Cuticles Too Far Back or Cutting Them Aggressively
This increases infection risk and can cause hangnails. Fix: gently push back cuticles and only trim loose skin with small nippers.
Mistake: Not Letting Layers Dry
Applying the next coat to tacky polish creates streaks and lumps. Fix: wait the recommended drying time between coats and use a quick-dry top coat if time is tight.
Nail Health: When to Rest and When to Strengthen
Polish looks great, but prolonged use of nail polish without breaks can cause dryness, brittleness, and discoloration. Rotate periods of polish with nail-care routines to keep nails healthy.
Strengthening Treatments
Consider these options if your nails are weak:
- Nail hardeners: Use sparingly; some formulas contain formaldehyde which can over-harden nails.
- Biotin supplements: Many people report positive changes, but consult a healthcare provider first.
- Moisturizing oils: Regular application of cuticle oil keeps nails flexible and less likely to split.
- Limit water exposure: Prolonged wetness weakens nails — wear gloves for chores.
When to Give Nails a Break
If your nails become thin, peel, or show signs of infection, give them a break from polish for a few weeks. During that time, apply cuticle oil daily and a strengthening base coat every few days.
Maintenance: Making Your Manicure Last
A few habits go a long way in extending the life of your manicure.
Daily and Weekly Habits
- Apply cuticle oil nightly to keep the nail bed hydrated.
- Wear gloves for cleaning and gardening to avoid chipping and chemical exposure.
- Reapply a thin layer of top coat every two to three days to refresh shine and protect edges.
- Moisturize hands frequently to prevent cuticles from drying out.
These little practices add up to weeks of good-looking nails.
Quick Fixes for Chips
If a chip appears, lightly file the edge to smooth it. Apply a thin dab of color just over the chip area — not the entire nail — and finish with a top coat to blend and seal. This spot repair keeps polish presentable until your next full redo.
Special Considerations: Gel, Shellac, and Dip Powders

If you use gel or dip powders at home, follow product instructions carefully. Gel polishes cure under UV/LED lamps and can last up to two weeks if applied correctly. Dip powders offer long wear and a distinct application method. Each system requires different prep and removal techniques to avoid damage.
Removal Tips for Gels and Dips
Never peel gel or dip powders off your nails — this strips layers of your nail plate and causes thinning. Use the recommended removal method, usually soaking in acetone with foil wraps and gentle pushing, or professional removal if you’re unsure. Rehydrate nails with oil afterward.
FAQ: Answers to Common At-Home Manicure Questions
How often should I do my nails?
It depends on your lifestyle and how quickly your nails grow. For many, every 1–2 weeks is common. If you prefer fresh polish more often, practice quick and gentle removal to protect nail health.
Can I mix brands of base/top coats and polish?
Yes, most top and base coats work with different polish brands. The only exceptions are when the product instructions explicitly recommend using their compatible system, as with some gel or hybrid formulas.
Is it okay to use acetone often?
Frequent acetone use can dry and weaken nails and cuticles. Use acetone when necessary but follow up with cuticle oil and hand moisturizer. Non-acetone removers are gentler for regular use.
What’s the best way to keep polish from bubbling?
Bubbles often come from shaking the bottle too hard or applying polish that’s partially dried out. Roll the bottle between your palms to mix, and apply thin coats at room temperature to minimize bubbles.
Tools Comparison Table: Budget vs. Invest
| Tool | Budget Option | Invest Option |
|---|---|---|
| File | Disposable emery boards | Glass or crystal file — gentler and lasts longer |
| Polish | Drugstore brands — good for color experimentation | Higher-end formulas for durability and rich finishes |
| Top Coat | Basic fast-dry top coat | High-gloss, long-wear top coat |
| Cuticle Tool | Cheap pushers and nippers | Ergonomic stainless steel tools for precision |
Decide where to splurge based on what matters to you: if you paint nails every week, invest in a good top coat and files. If you change colors constantly, stock inexpensive polishes for variety.
Troubleshooting: Problems and Solutions
Problem: Polish Lifts at the Sides
Solution: Make sure you cap the free edge with each coat and apply thinner coats. Clean up any oils on the nail with remover before painting.
Problem: Nails Peel After Removal
Solution: Stop peeling off polish and use proper removal methods. Rehydrate nails with oil and consider a strengthening treatment.
Problem: Bubbles Form During Drying
Solution: Avoid shaking bottles and apply thin coats in stable room temperature. Use fresh polish rather than old, thickened bottles.
Problem: Nail Polish Smudges Immediately After Painting
Solution: Allow adequate drying time between layers. Use a quick-dry top coat or cooling fan, and minimize hand movements immediately after.
Making It a Ritual: Practical Tips for a Relaxing Session
Turn your at-home manicure into a small ritual. Play music or an audiobook, light a candle, and set a cozy spot with a towel and a small lamp. Work in natural light if possible; it makes it easier to see streaks and smudges. Treat the session as self-care rather than a chore. The more relaxed you are, the steadier your hand will be and the more you’ll enjoy the process.
Timing Tips
- Plan for about 45–90 minutes depending on the level of nail art you attempt.
- Do your nails early in the evening so they dry fully before bed.
- Schedule weekly touch-ups or top coat reapplications to maintain shine.
Practice Makes Perfect
If your first few at-home manicures aren’t flawless, don’t worry. You’ll get steadier and faster with practice. Try practicing complicated nail art on a nail wheel or a piece of paper first. Over time, you’ll develop a routine that fits your pace and yields beautiful results.
Where to Learn More
There are many online tutorials, short courses, and communities where people share tricks and step-by-step videos. Watching someone do a technique in real time can help more than written instructions. But remember: the best teacher is your own experience.
Conclusion
Doing a perfect at-home manicure takes a little patience, the right tools, and a gentle touch, but it’s absolutely achievable and deeply satisfying. Start with a clean, dry canvas, use thin layers of polish, apply a protective base coat and glossy top coat, and give your nails time to dry between steps. Treat cuticles with care, hydrate nails regularly, and don’t be afraid to experiment with simple nail art. With practice and these step-by-step techniques, you’ll quickly develop a routine that delivers salon-quality results from the comfort of your home — and perhaps more important, a small ritual that brings calm and a sense of accomplishment to your day.