There’s something undeniably satisfying about a fresh manicure: the glossy finish, the neat edges, and the little confidence boost when you glance at your hands. Gel manicures, in particular, have dominated the beauty world for good reasons — durability, shine that lasts weeks, and finishes that look professional. But salon visits can take time and money, and not everyone loves the idea of sitting under a lamp for an hour surrounded by strangers. That’s why mastering gel manicures at home is a game-changer. This guide will teach you everything from choosing the right products and lamps to pro-level application, removal, maintenance, and nail health tips so you can achieve salon-quality results without leaving your house.
Let’s be clear: doing gel nails at home isn’t a magic trick, but it does require patience, a few essential tools, and a willingness to practice. In these pages you’ll find clear, step-by-step instructions, recommended product types, troubleshooting tips, and creative ideas for designs. Whether you’re a complete beginner or you’ve tried a DIY gel once and ended up with bubbles and chips, there’s something here for you. Follow this guide, and your next manicure can last two or three weeks while still looking fresh.
Why Choose Gel Manicures?

Gel manicures last significantly longer than traditional polish. While a regular manicure might chip in a few days, gel often stays glossy and chip-free for two to three weeks. That longevity comes from the curing process: gel polish is resin-based and hardens under UV or LED light, creating a durable, flexible surface that resists daily wear. For busy people who don’t want the daily upkeep, gel is a practical choice.
Another big advantage is the high-shine finish gel delivers. It maintains that “wet” glossy look throughout wear, unlike regular polish that can dull within days. Plus, gels are excellent for short nails, long nails, natural nails, and even for extensions when applied over tips or forms. The versatility means you can switch colors, textures, and designs while maintaining a durable base.
Finally, when done properly, gel manicures can be gentler on nails than some other enhancements. Because gel polishes are relatively thin, they don’t require as much filing and sculpting compared to acrylics. When you use healthy removal techniques, gel can be part of a nail care routine that keeps nails strong instead of brittle.
Essential Tools and Supplies
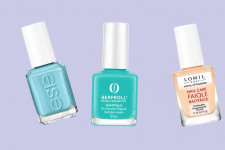
To do a proper gel manicure at home, assemble a kit. Investing in decent quality tools will make a big difference in results and overall nail health. Below is a recommended list of essentials that will get you started.
Basic Kit Checklist
- LED or UV lamp (LED recommended for speed)
- Base coat gel polish
- Color gel polish(s)
- Top coat (gel)
- Gel polish remover or acetone
- Lint-free wipes
- Isopropyl alcohol (70%+)
- Cuticle pusher or orange stick
- Buffer and nail file (100/180 grit recommended)
- Cuticle oil
- Optional: nail clippers, nail tips/forms, gel cleanser
Choosing a Lamp: LED vs UV
Your lamp choice affects cure time and gel compatibility. LED lamps cure faster — typically 30–60 seconds per coat — and are more energy-efficient. UV lamps work with all gel polishes but take longer to cure. Many modern gels are labeled “LED/UV” meaning they work under either lamp, but always check product recommendations.
| Feature | LED Lamp | UV Lamp |
|---|---|---|
| Cure Time | 30–60 seconds per coat | 2–3 minutes per coat |
| Bulb Life | Longer | Shorter; bulbs need replacement |
| Energy Use | Lower | Higher |
| Compatibility | Some gels only LED-safe | Most gels compatible |
Prepping Your Nails: The Foundation of Success
The secret to a long-lasting gel manicure starts with prep. Skipping prep is the most common reason gels lift or chip early. Take the time to properly clean and shape your nails.
Start by removing old polish with acetone-free remover if you’ve had regular polish on. If you are removing a prior gel, follow safe soaking methods (explained later). Trim and file nails to your desired shape. Use a 180-grit file to shape and a 240-grit or finer to smooth edges. If you use nail tips, now is the time to apply them and blend them carefully with a fine file.
Push back cuticles gently—do not cut unless you have experience. Pushing cuticles creates a clean nail plate and helps the gel adhere longer. Next, lightly buff the surface of the nail with a 100/180 buffing block. The goal is to remove shine, not to thin the nail. Over-buffing weakens nails and can lead to sensitivity.
Clean the nail plate with a lint-free wipe soaked in isopropyl alcohol or gel cleanser. This removes oils and dust that prevent adhesion. Let your hand air dry for a few seconds before applying base coat.
Common Prep Mistakes to Avoid
- Over-filing the nail plate — avoid thinning natural nail.
- Skipping dehydration — oils on the nail prevent bonding.
- Applying product to the cuticle — this causes lifting.
- Heavy-handed buffing — it creates weak nails.
Step-by-Step Gel Manicure at Home
Now for the fun part: application. Read each step slowly and follow the order. Rushing through layers or not curing properly is a fast track to disappointment.
Step 1 — Base Coat
Apply a thin, even layer of base coat. Think of the base coat as the glue that bonds the color to your nail. Avoid getting the base coat on the cuticle and the sidewalls. If you accidentally touch the cuticle, use the brush to pull the product back before curing. Cure according to your lamp’s instructions (typically 30–60 seconds for LED; 2 minutes for UV).
Step 2 — First Color Coat
Apply a very thin first color coat. Thin coats are crucial with gel; thick coats can result in wrinkling or uncured tacky layers. Swipe the brush from the cuticle line toward the tip, leaving a small gap at the cuticle to prevent flooding. Cure this coat fully.
Step 3 — Second Color Coat
Apply a second thin color coat for full opacity. Most colors need two thin layers; darker or sheer shades may require three, but always stick to thin layers. Cure. If you notice streaks, a third thin layer may be required.
Step 4 — Top Coat
Apply your gel top coat to seal in color and add shine. Make sure to cap the free edge (the tip) with each layer — swipe the brush along the tip edge to seal. This prevents water and debris from getting under the polish. Cure the top coat fully and then wipe the tacky inhibition layer with a lint-free wipe soaked in isopropyl alcohol or gel cleanser to reveal the glossy finish.
Tips for Perfect Application
- Work on one hand at a time if you’re using a lamp that requires you to set the hand under the device; otherwise, apply to both hands in the same order if possible.
- Maintain a light hand — pressure on the brush spreads product unevenly.
- Cap the free edge for long-lasting wear.
- If you flood the cuticle, quickly use a small brush dipped in alcohol to clean before curing.
Removal: Keep Nails Healthy
Proper removal is just as important as proper application. Peeling or prying off gel can strip layers of nail plate and cause long-term damage. Always soak gel off safely.
Safe Removal Steps
- File the top layer of the gel gently to break the seal. Use a 180-grit file and be careful not to file down to the natural nail.
- Soak cotton balls in acetone and place them on each nail.
- Wrap each fingertip with aluminum foil to hold the cotton in place. Leave on for 10–15 minutes (LED gels may require less time; check product instructions).
- Remove foil and press gently on the gel with an orange stick; the gel should slide off. If it resists, rewrap and soak a little longer.
- Once most gel is removed, use an acetone soak or a buff to clean residue, then wash hands and apply cuticle oil.
Avoid picking at remaining bits. If small stubborn pieces remain, use a buffer with light pressure to remove them. Follow with a nourishing oil to replenish moisture.
Non-Acetone Alternatives
If you prefer to avoid acetone, some “soak-off” formulas and specific peelable base coats exist, but they may not be as long-lasting. For robust, lasting gel, acetone-removal remains the most reliable method.
Common Problems and How to Fix Them
Even pros run into issues. Here’s how to troubleshoot the most common gel manicure problems:
1. Lifting
Lifting means the gel peels at the edges. Causes include oil on nail plate, insufficient curing, or product getting on the cuticle. Fix it by trimming lifted areas and reapplying base and color, sealing edges. For persistent lifting, remove and start again, ensuring you properly dehydrate nails beforehand.
2. Chipping
Chips usually occur from not capping the free edge or from impactful activities. Ensure you seal the tips during base, color, and top coat. File any rough edges to prevent further snagging.
3. Wrinkling or “Fish Eyes”
Wrinkling can be caused by applying too-thick coats or not curing properly. Use thin coats and cure each layer fully. Fish eyes (small circular gaps) can result from oils or silicone contamination — clean nails well and avoid oily lotions before application.
4. Bubbles
Bubbles often occur when the brush is flicked or the polish is shaken too vigorously. Roll polish bottles gently between your hands instead of shaking, and apply with smooth, even strokes.
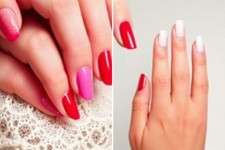
Designs and Creative Ideas
Gel is great for creative experiments because it doesn’t dry until cured, which gives you time to manipulate and create effects. Whether you’re doing simple solids or intricate art, here are ideas to try.
Simple Looks
- Classic solid color — a quick, polished look.
- French manicure — build with a neutral base and white tip or use reverse French with a cuticle accent.
- Ombre — use a sponge or blending brush with two gel colors, then cure.
Advanced Techniques
- Foil and chrome — apply special adhesives and powders for metallic effects.
- Encapsulated designs — use builder gel to trap glitter or small decals under a clear layer.
- Marble and water-color effects — utilize thin gel and pointillist blending before curing.
Tools for Nail Art
- Thin striping brush for lines and French tips.
- Dotting tools for polka dots or floral motifs.
- Silicone brushes for marbling and blending.
Nail Health: Balance Beauty with Care
Doing gel manicures frequently can be safe if you take steps to protect and nourish nails. Rotating with polish-free periods and focusing on cuticle care keeps nails strong.
Strengthening and Maintenance Tips
- Use cuticle oil daily to maintain elasticity and prevent hangnails.
- Give your nails a few days to breathe between gel sets when possible.
- Use a strengthening base coat or nail hardener occasionally (choose products compatible with gel systems).
- Keep nails trimmed to a length that suits your lifestyle — longer nails chip more easily.
If you notice thinning, discoloration, or pain, stop gel application and consult a dermatologist or nail technician. These signs can indicate allergic reactions or infections.
How to Build a Budget-Friendly Home Gel Kit
You don’t need to break the bank to get into gels. Here’s a simple cost-effective setup for beginners that balances price and performance.
| Item | Budget Option | Estimated Cost |
|---|---|---|
| LED Lamp | Basic 36W LED UV Lamp | $20–$40 |
| Gel Polish Set | Starter 6-color kit with base/top | $15–$30 |
| Files & Buffers | Reusable set | $5–$10 |
| Acetone & Accessories | Acetone, foil, cotton | $10–$15 |
| Cuticle Oil | Basic bottle | $5–$10 |
Total starter cost can be under $100 if you shop smartly. Investing slightly more in key items like the lamp and a reputable base/top coat will yield better results.
Timing and Routine: How Long Does It Take?
When you’re new, expect your first full manicure to take 60–90 minutes. As you get practiced, you can do a single-color gel set in 30–45 minutes. Removal typically takes another 15–30 minutes, depending on soaking time and how careful you are.
Here’s a rough timeline for a complete at-home gel manicure:
| Task | Time |
|---|---|
| Prep (clean, file, push cuticles) | 10–15 minutes |
| Base coat + cure | 3–5 minutes |
| Color coats (2 coats + cure) | 8–10 minutes |
| Top coat + cure + cleanse | 5–8 minutes |
| Finishing touches (cuticle oil, clean edges) | 2–5 minutes |
Safety Considerations
While gels are generally safe, remember a few safety basics. Limit UV exposure by using LED lamps or applying sunscreen to your hands before curing with UV. When using acetone, do it in a well-ventilated area and avoid prolonged skin contact. Always follow instructions and keep products away from children and pets.
If you experience persistent burning, itchiness, or nail pain, stop using the products and consult a medical professional. Allergic contact dermatitis can occur, and it’s important to identify the trigger.
Professional vs. At-Home: When to Visit a Salon
There are times when a professional salon is the better choice. If you want complex sculpted extensions, advanced 3-D nail art, or a corrective service for damaged nails, professionals have tools and training beyond most home setups. Also, for weddings or special events where you want guaranteed perfection, a salon appointment can reduce stress.
That said, for regular color changes, touch-ups, and basic extensions, many people find at-home gels more than sufficient. The key is knowing your limits and recognizing when a pro can help.
Frequently Asked Questions
How long will an at-home gel manicure last?
When done properly, expect 2–3 weeks of wear. With careful prep, capping the free edge, and proper removal, you can maximize longevity.
Can I use regular polish over gel?
You can apply regular polish on top of gel-top coat, but it’s not recommended for long-term wear because it may not adhere well and will hide the advantages of gel. If you want the removal simplicity of regular polish later, consider peelable base coats.
Is gel safe for my nails?
Yes, when applied and removed correctly. Avoid peeling and prying. Use cuticle oil and take breaks between sets if you notice nail thinning.
What if my gel causes an allergic reaction?
Stop using the product immediately and consult a physician. Keep a record of the brands used to help identify the allergen.
Shopping Guide: What to Buy First
If you’re building your kit, start with these priorities:
- LED Lamp — reliable curing is essential.
- Quality base and top coat — these are critical for adhesion and shine.
- A couple of neutral colors and one bold shade — versatility for different looks.
- Acetone and cleanup supplies — safe removal matters.
Add art tools and specialty polishes as you expand your skills.
Practice Makes Perfect: Tips to Improve Faster
Your first few attempts may look less than salon-perfect, and that’s okay. Practice on a friend, plastic nail wheel, or even press-on tips to get used to brush control and product consistency. Film yourself or watch slow-motion tutorials to see where your technique can improve. Keep a small kit of disposable hand towels and lint-free wipes on hand to clean up mistakes quickly.
Ask for honest feedback and look for small wins, like cleaner cuticle lines or faster curing times. Over time, your hand will become steadier, and your color application will look smoother.
Maintenance: Keep It Looking Fresh
To extend the life and appearance of your gel manicure:
- Apply cuticle oil daily to keep the skin around nails healthy.
- Avoid long exposure to harsh detergents; use gloves for cleaning.
- Lightly buff and reapply top coat if shine dulls after a week.
- File any tiny chips immediately to prevent further damage.
Regular maintenance keeps nails looking salon-fresh without the salon.
Conclusion
Mastering gel manicures at home is a rewarding skill that saves time and money while letting you express creativity and maintain polished nails on your own schedule. With the right tools — especially a good LED lamp, quality base and top coats, and a few reliable colors — plus proper prep, thin-layer application, and safe removal practices, you can achieve long-lasting, chip-resistant, and glossy results. Practice patiently, prioritize nail health, and don’t hesitate to consult professionals when you want complex work or corrective care. With these guidelines and tips, you’re well-equipped to build a comfortable at-home routine that keeps your nails healthy, beautiful, and ready for any occasion.