Repairing a broken nail at home can feel like a small crisis or a creative opportunity, depending on how prepared you are and how much finesse you want to apply. Maybe you slammed a finger in a door, snagged a manicure on your sweater, or noticed a delicate split that’s threatening to tear the whole nail away. Whatever the cause, a broken nail can be painful, inconvenient, and oddly personal — after all, your hands are one of the first places people notice. The good news is that with a few simple supplies and the right technique, you can stabilize or repair most breaks quickly and safely at home, so you can keep working, typing, or showing off your hands without hobbling through everyday tasks.
I’ve written this article to walk you through everything you need: how to assess a break, immediate steps to take, three reliable at-home repair methods (superglue, tea bag/silk wrap, and gel/overlay alternatives), aftercare, and how to prevent future breaks. Read on for straightforward, step-by-step instructions, a handy supply checklist, a comparison table of methods, troubleshooting tips, and safety advice. Whether you’re a nail novice or you regularly tinker with at-home manicures, this guide gives you practical choices and explains when to call a professional or a doctor.
Why Nails Break: The Causes Behind That Sudden Snap

Nails are tougher than they look, built from densely packed keratin fibers, but they’re still vulnerable. Understanding why nails break is the first step to fixing them properly and preventing repeat episodes. Breaks often fall into a few familiar categories: mechanical trauma like catching a nail, dryness and brittleness from frequent hand washing or harsh chemicals, structural weakness from biting or improper filing, genetics, or underlying health issues such as nutrient deficiencies or thyroid problems. The location of the break — at the tip, the side, or near the cuticle — also changes how you should approach the repair.
When you examine the break, ask yourself: is there bleeding? Is the nail partially attached to the nail bed? Does the tear extend into the living skin under the nail (the quick)? If it’s a clean break at the free edge, it’s usually easy to repair. If the nail is torn down into the quick or if there’s significant pain or swelling, you should consider seeing a medical professional to avoid infection or long-term damage.
Immediate First Aid: What to Do Right After a Nail Breaks
The first few minutes matter. Calmly clean the area to avoid infection, control any bleeding, and protect the nail from further damage. Here’s a simple immediate-response checklist that most people can do at home within five minutes.
Step-by-step immediate actions
Gently rinse the finger or toe under cool water to remove dirt and debris. If there is minor bleeding, apply light pressure with a clean cloth or sterile gauze until the bleeding stops. If the nail is hanging by a sliver and causing pain, trim any protruding loose pieces with sanitized nail clippers to reduce snagging. Avoid forcibly ripping off large segments — that can widen the injury.
If the nail bed is exposed or the nail is partially detached, cover it with a sterile dressing and seek medical advice. Otherwise, after cleaning and drying, you can choose a home repair approach. Make sure to work in a well-lit space and to have patience — rushing often creates more problems.
Tools and Supplies: What You Need to Repair a Broken Nail at Home
Before attempting a repair, gather your supplies so the process is smooth. Here’s a simple list to get you started. Having the right tools makes a huge difference.
- Clean, dry towels or tissues
- Antiseptic or rubbing alcohol
- Superglue (cyanoacrylate) or nail glue formulated for nails
- Tea bag or coffee filter, or silk/wrap strips if you have them
- Fine nail file (240 grit or higher) and a buffer
- Nail clippers and small scissors
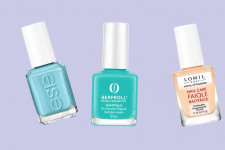
- Base coat and top coat (optional)
- Cuticle oil or moisturizer
- Optional: clear gel polish and an LED lamp (if doing a gel overlay)
- Sterile gauze and bandages (for protection while healing)
If you plan to use the tea bag method, any breathable paper like a coffee filter or a piece of tea bag works. If you’re thinking of silk wraps, you can buy small pre-cut silk strips designed specifically for nails. Superglue is inexpensive and effective in many situations, but it’s not always the gentlest option; nail glue is formulated for the job and often lasts longer.
Method 1 — The Quick Fix with Superglue or Nail Glue
Superglue is a fast, inexpensive fix that many people rely on. It’s ideal for a nail that has a clean break or a small tear not too close to the cuticle. This method stabilizes the nail and reduces snagging until the nail grows out or you can do a more durable repair.
Supplies and preparation
You’ll need: nail or superglue, a fine file, clean cotton, acetone or nail polish remover, and optionally a base/top coat. Work on a non-porous surface to avoid glue mishaps and have acetone nearby in case of mistakes.
Step-by-step superglue repair
- Clean the nail and surrounding skin with soap and water, then use rubbing alcohol to ensure it’s completely dry.
- If the broken piece is still attached and salvageable, try to press it back into place gently. If the piece is hanging and painful, trim the excess carefully with clippers.
- Apply a tiny drop of glue to the broken area. Press the pieces together for 20–30 seconds until the glue sets. Use very small amounts to avoid excess glue on skin.
- Once the glue is dry, gently file the nail edge to smooth rough areas. Avoid aggressive filing that thins the nail too much.
- Apply a clear base coat or top coat over the repair to seal and strengthen it. Reapply the top coat every few days to maintain the seal.
Pros of this method include speed and minimal materials. Cons are that superglue can become brittle and might not last as long as professional overlays, and it’s not suitable for wounds with exposed nail beds.
Method 2 — The Tea Bag or Coffee Filter Repair (A Gentle, Cheap Option)
If you want a smoother, less brittle repair than straight glue, the tea bag method is a favorite among DIYers. It creates a thin, flexible patch that blends into the nail and can be polished over for a natural look.
Why it works
The tiny fibers in a tea bag or coffee filter act like a fabric patch when imbued with glue or resin. They add reinforcement without bulk and can be smoothed almost invisibly. This method is especially helpful for splits that start at the free edge and are traveling upwards.
Step-by-step tea bag repair
- Clean and dry the nail thoroughly. Remove all polish and oils with acetone or nail polish remover.
- Cut a small piece of tea bag or coffee filter to cover the break, allowing overlap on all sides.
- Apply a thin layer of nail glue or clear base coat over the break. Place the fabric piece on the wet glue and smooth it down gently with a toothpick or the flat side of an orangewood stick.
- Apply another thin layer of glue or base coat over the fabric to saturate the fibers. Let it dry completely.
- Once dry, gently buff the surface with a fine file or buffer to blend the patch with the rest of the nail and create a smooth surface for polish.
- Finish with a base coat, polish if you like, and several layers of top coat for durability.
This method gives a more flexible, cosmetically pleasing fix and can last for a week or more with careful handling. It’s a terrific option for people who want a near-invisible repair without going to a salon.
Method 3 — Silk or Fiberglass Wraps and Gel Overlays (More Durable)
If you want a longer-lasting and stronger repair than tea bags, silk wraps or fiberglass strips paired with resin or gel create a robust reinforcement. This is closer to salon work and can last several weeks if done carefully.
What you’ll need
Silk or fiberglass wrap kit (sold for nails), resin or wrap adhesive, small scissors, an implement to smooth the wrap, and optionally a clear gel and LED lamp if you plan to seal with gel. These kits are made for at-home use but take a little practice to master.
Step-by-step silk/fiberglass wrap repair
- Prepare the nail by cleaning and removing any polish. Push back the cuticle gently if needed.
- Trim and file the nail to a manageable shape.
- Cut a piece of silk or fiberglass slightly larger than the break. Apply resin or adhesive to the nail and place the wrap over the break.
- Smooth the wrap with a small brush or applicator, ensuring no bubbles or creases, and cure or let dry according to the product instructions.
- Once cured, file and buff the surface to smooth out edges. Apply a gel overlay and cure if using gel, or finish with base and top coat for traditional systems.
This method is the most durable of the at-home options and more professional-looking. It requires a few more materials and some patience but can be worth it if you want a strong, long-lasting repair.
Comparing Repair Methods: Which One Should You Choose?
Different methods suit different breaks and lifestyles. The table below summarizes durability, difficulty, cost, and ideal use:
| Method | Durability | Difficulty | Cost | Best for |
|---|---|---|---|---|
| Superglue/Nail Glue | Short to medium (days–weeks) | Low | Low | Quick fixes at the free edge; small breaks |
| Tea Bag / Coffee Filter | Medium (1–2 weeks) | Low–Medium | Low | Cosmetic repairs; fine splits |
| Silk/Fiberglass Wrap + Gel | Medium–High (weeks) | Medium–High | Medium | Stronger repairs; deeper splits; salon-like finish |
| Salon Acrylic/Gel Replacement | High (weeks–months) | High | High | Major damage; long-lasting fix; professional look |
Pick the method that matches how long you need the repair to last, how skilled you feel, and how much time and money you want to invest. For a night out, tea bag or glue is great. For several weeks of normal use, consider a silk or gel overlay.
Troubleshooting Common Problems
Even with careful work, things can go sideways. Here are common issues and how to solve them.
Glue oozing onto skin
If glue gets on your skin, gently roll the area between your fingers — superglue bonds skin easily but will loosen after a few hours with gentle washing or soaking in warm, soapy water. Acetone will dissolve cyanoacrylate, but be careful because it can dry and irritate skin.
Patch peeling up
If a tea bag or wrap starts to lift, carefully trim the loose edge with scissors, apply a little extra glue under the lifted portion, press down, and seal with top coat. If it keeps peeling, it might have been applied to an oily nail; next time, use acetone to fully de-grease the nail.
Repair is painful or nail bed looks infected
Redness, swelling, increasing pain, or pus around the nail are signs of infection. Stop home repairs and see a medical professional promptly. If you have a fever or significant spreading redness, seek urgent care.
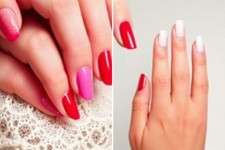
Cosmetic Touches: Making the Repair Look Natural
People often worry that a repair will look obvious. With a few tips, you can blend the patch with the rest of your nail and enjoy a polished appearance.
- Use fine grit files and buffers to smooth the repair so polish sits evenly.
- Apply thin layers of polish rather than thick coats to prevent lifting.
- Match the shape of your nail — slightly rounded or square — to avoid weak corners that will snag.
- Finish with at least two coats of a strong, glossy top coat for shine and protection.
- Consider neutral shades for camouflaging repairs more easily than dark or glittery polishes that may highlight texture differences.
Aftercare: Protecting the Repair and Encouraging Healthy Growth
Once your nail is repaired, treat it gently to allow healing and growth. Keep the area moisturized, avoid harsh chemicals, and protect your hands for at least the first 48–72 hours after repair.
Use cuticle oil daily to nourish the nail and surrounding skin. Wear gloves for dishwashing and cleaning tasks, and avoid using your nails as tools. Replenish your top coat every few days to keep the seal intact. If you notice the repair loosening, reapply or redo the patch before the tear worsens.
When to See a Professional or a Doctor
While most broken nails can be handled at home, there are times when professional help is warranted. Seek medical care if you have severe pain, large portions of nail missing, persistent bleeding, or signs of infection like swelling, redness, warmth, or pus. If the nail bed is exposed or the nail is torn down to the cuticle and won’t stay attached, a doctor or podiatrist (for toenails) can assess whether the nail needs trimming, reattachment, or removal under sterile conditions.
For cosmetic or durable long-term results, a trip to a reputable nail technician can be worthwhile. Professionals can apply acrylics, gel overlays, or perform reconstructive services more evenly and with materials that last longer than many at-home options.
Prevention: How to Keep Nails Strong and Avoid Future Breaks
Prevention is always better than repair. Strong, well-maintained nails are less likely to break. Some of the most effective preventive steps are simple lifestyle and grooming habits.
Daily habits to strengthen nails
- Moisturize nails and cuticles daily with oil or cream to prevent drying and splitting.
- Trim and file nails regularly; file in one direction to avoid splintering.
- Wear gloves when cleaning, gardening, or doing prolonged water work.
- Avoid aggressive cuticle pushing or cutting which can damage the nail matrix.
- Limit acrylic or gel use if you notice recurring weakness, giving your nails breathing time between applications.
Diet and supplements
Nail health is linked to nutrition. Ensure adequate protein intake and consider supplements like biotin, which some studies suggest can improve brittle nails. Iron, zinc, and vitamins A, C, and E also play roles in overall nail health. Check with your healthcare provider before starting supplements, especially if you have underlying medical conditions.
Special Situations: Toenails, Kids, and Severe Splits
Toenails and fingernails behave differently because of different stress and growth rates. Toenails generally grow slower and are thicker, so repairs may last longer but can be more awkward to manage in shoes. For kids, take care to use very small amounts of glue and to supervise carefully; a playful child might accidentally get glue on skin or ingest it.
If a finger or toe is numb, you suspect a fracture, or the injury happened under high force (car door, heavy object), consider professional evaluation. Sometimes a severe nail injury accompanies bone trauma.
How Long Will a Repair Last? Realistic Expectations
Expectations vary based on repair method, nail health, and how you treat the nail afterwards. Quick superglue fixes may last a few days to a couple of weeks if you’re careful; tea bag repairs often hold for one to two weeks; silk/fiberglass wraps or salon overlays can last anywhere from two weeks to a month or more with proper care. Remember that nails grow slowly — fingernails grow about 3 mm a month on average, and toenails well slower — so a full regrowth from base to tip takes time.
Step-by-Step Handy Guide You Can Bookmark
Here’s a concise sequence you can follow quickly the next time a nail breaks:
- Stop the bleeding with gentle pressure and clean the area.
- Assess if the nail bed is involved — see a doctor if it is.
- Trim any dangerously loose pieces with sanitized clippers.
- Decide on a method (glue for speed, tea bag for cosmetics, silk/gel for durability).
- Prepare your workspace and materials; de-grease the nail with acetone.
- Apply the repair carefully and allow to dry or cure completely.
- Buff and polish for cosmetic finish; seal with top coat.
- Protect the nail with gloves and moisturize daily; re-seal as needed.
Common Myths and Misconceptions
There are several myths floating around about nails that can confuse decision-making. For example, nails do not “bleed” — blood comes from the nail bed, not the nail itself. Another myth is that you should immediately rip off a broken nail; as a rule, avoid ripping nails because it increases the chance of further trauma and infection. Finally, while home methods like tea bags and superglue work well for many people, they are not universal fixes — know when to consult a pro.
Final Tips from the Trenches
When you repair a nail at home, patience and small touches matter. Use very small amounts of glue, allow each layer of product to dry fully, and resist the urge to test the repair forcefully right away. If you have frequent breaks, keep a small “repair kit” in your bag with clear glue, mini nail file, small scissors, and a top coat for emergencies. With practice, you’ll get faster and your repairs will look more seamless.
Conclusion
A broken nail is rarely a catastrophe — with a calm approach, basic supplies, and the right technique you can usually stabilize and repair most breaks at home, from quick superglue fixes for urgent needs to tea bag and silk wrap methods for more polished results. Prioritize cleaning and protecting the area, choose the repair method that fits how long you need it to last, and treat the nail gently afterward. If you encounter severe pain, signs of infection, or a nail bed injury, seek medical attention. Over time, simple preventive habits like moisturizing, wearing gloves, proper filing, and good nutrition will reduce the likelihood of future breaks and keep your nails healthy and ready for whatever comes next.